Tuesday, March 31, 2015

Harrisburg PA Super Swap...


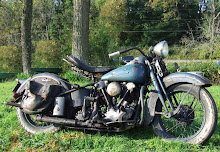
Brought my 47 U Apehanger to the Harrisburg Show...I recently changed the seat out to this Bates and will be making a few more changes coming up soon...

Mike's 1918 Reading Standard

Scored these sweet 1954 Only Servi-Car tanks...

With both emblems...

...both gas caps and fuel shut off...

I picked up this nice pair of star hub wheels real reasonably...

They have the -62 style rims...

Went out to the Harrisburg Super Swap this weekend. I had been sick and thought I was on the up swing...I was not! I was sick as a dog all weekend (and still). I don't have many pics at all....I did score a nice pair of '62 and later star hub wheels and a real nice set of 1954 only Servi-Car tanks. My '54 Servi-Car has one wrong tank on it so these (one year only) tanks had to come home with me!

Sunday, March 22, 2015

Random Sunday Pics...

Let there be light!

Easter Egg hunt...

Mucho Dinero...

Ahhhhhh......

A friends stuck project

Same bike

Heads off it

Ice Race Ready

Framed

Front tire needs help on the 57 Ape Hanger

Got a NOS one!

Now if it would just jump on there...

More 39 EL work

But not much more...

45 trans waiting for me to drop it in...

1st day of Spring...

Shoveled out the Dirty Nine...Again...


Monday, March 16, 2015

1939 EL Clutch Removal

Remove the 4 nuts and lock washers

Fugly...bend the lock ring around so it ain't locked

A couple nuts and washers to depress the springs which in turn removes pressure from the lock tab and adjusting nut

Harley- Davidson Special Wrench 12746-36

Move the Harley- Davidson Special Wrench 12746-36 outta the way and hit the nut (Reverse Thread) with a hammer and punch for initial loosening...if there were ever a nut designed for a hammer and punch, this is it!

Now use Harley- Davidson Special Wrench 12746-36 to spin off the nut...

And there you have it...

Time to remove the basket...

A couple more plates hiding in there

Basket removed...

Now the "Clutch Hub"...

Harley-Davidson Special Puller 12749-36...

You actually need this puller but... 
at least you get to hit it with a hammer!

'''Pop''' she goes...

Nice inner primary but it needs the top bracket put on...

Nice...everything else is on it...

Now what...

Saturday, March 14, 2015

1939 EL Handlebar Throttle Side Plunger Reassembly...

Ready to re-install the spiral innards AKA Plunger Assembly...

Takin' the old wire out...

Need to remove the wire "end" and fastening screw from the old wire

This "end" was slightly crimped so I had to put the wire in the vice and give it a tap with a hammer and punch...it popped through..

Slide the control wire fastening screw and then the control wire "end" onto the wire...

close up...

Bend the tip of the wire to a sharp 90, slide the control wire "end" up so that the wire is in the groove and trim the wire so that it doesn't stick out the side of the "end"

Ready to install the handle bar plunger...

Plunger away!

Grease and slide the plunger into the handlebar. Once in position... insert the plunger pin, roller block and plain roller. Grease it up some more and slide on the spiral...

Screw in the handlebar end nut. Notice that this is another wear area...The end of the spiral wears out from turning against the end nut. I've been known to switch this spiral with the timing side which doesn't wear as much...I'm gonna run it like this and see how she feels...

OK...done...next...